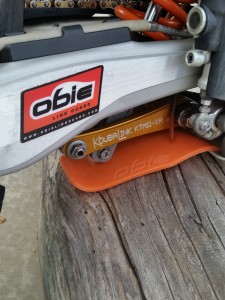
At Obie Link Guard, we are concerned about your dirt bike linkage protection. We want to make sure you have the proper dirt bike linkage protection that is state of the art as well as affordable. That’s why we created the Obie Link Guard. It provides dirt bike linkage protection from mud and dirt, as well as obstacles like rocks, boulders, logs and the like. The Obie Link Guard is available for most brands and models of dirt bikes. Best of all the Obie Link Guard is lightweight, durable, easy to install, and affordable. For both quality and price you can’t get better dirt bike linkage protection than the Obie Link Guard. As an environmentally friendly company we think it is important that each of us do our part. With this in mind, we manufacture this special dirt bike linkage protection with recycled plastic. It’s also an American product built in Boise, Idaho and tested in the mountains and hills that surround the area. Continue reading Dirt Bike Protection – What Type of Dirt Bike Linkage Protection Do You Need?
Tag: Dirt Bike Linkage Protection
10 Tips for Dirt Biking on Rocky Terrain
Handling a dirt bike on rocky terrain can be a challenge. Knowing how to control the power of a dirt bike can also be a challenge even for the experienced biker. With my many years of riding and racing on these types of trails and terrain, I have come up with some basic strategies for maneuvering over rough terrain. Here are 10 tips to manage rough terrain more easily.
- To negotiate rocky terrain, first scan the area and look for the smoothest possible path. Then when you enter the path, grip the dirt bike with your legs and stand up. This will keep the bike somewhat straight. Do not sit down on the bike’s seat. Also, know that If you stare at a rock . . . you WILL hit that rock!
- If the rocks are really rough, your first reaction would be to look at your dirt bike’s front fender. Don’t do this! Take your eyes off the front of your bike and look around for the smoothest line. (Note: the closer to the bike you look, as opposed to looking off at a distance on the trail, the slower you will go.)
- When riding at faster speeds through the terrain, be careful of plowing through sage brush or other small bushes. Rocks live behind bushes and you’ll soon find yourself doing a big flying W.
- I typically run 15 psi of tire pressure at my shop the night before I ride. I know this is not the same as checking the pressure on your tires when you’re riding (i.e. at certain altitudes and temperature), however, this definitely works for me. I can count on one hand the number of flats I have had during my 40 years of riding and racing on Idaho terrain.
- Keep your body weight centered on the bike most of the time. However, if there are bigger rock ledges you need to get over, lean back a little. Accelerate a little and pull the handle bars back so you won’t find yourself going over the handlebars.
- Watch some trial riding videos or, better yet, ride a trials bike if you get a chance. It will definitely help with your balance.
- Especially when riding rocky terrain, always remember to keep up your momentum. Instinct tells you to stop whenever the rocks become bigger. If you do stop, you can stall and tip over. Do not stop – do not panic! You need momentum to get you through areas where the front end of the bike will drop. You do not want your front end to get stuck up in a hole.
- Sometimes, you find yourself stalling through a rough, rocky spot on the trail. Remember that your clutch action has to be very smooth. Keep your fingers on the clutch at all times so you can easily pull the clutch when you need to. If there is an obstacle, do not hesitate to give more power to the bike. Be sure to keep your other finger on the front brake. You would use that if you need to stop or slow down the bike in a hurry. A Rekluse clutch (www.rekluse.com) is worth considering and can be very helpful in these types of gnarly rock sections.
- When riding in the mountain rocks, a soft compound rear tire or rear trials tire will help with your maneuvering. However, the drawback to a running a trials tire is they don’t stop well and they do have poor traction in the mud and/or snow.
- The last and final tip I would recommend is to follow my Bench Racing Blog. I intend to give you good, up-to-date content with regard to dirt bike riding and racing, and tips for protection and maintenance of your bike. I also intend to give good advice and tips with respect to being a better, more efficient rider/racer and keeping your bike investment at a premium with linkage protection.
Remember . . . protection is good!
About the Author:
Mark Olberding has been riding and racing in Idaho for the past 40 years. Mark received his Pro Motocross License in 1983 and has received many first place finishes throughout his racing career. His most recent racing accomplishments were placing first in the Master’s Class and 15th overall at the 18th Annual Oreana 100 Hare and Hound, and placing 1st in the “A” Super Senior Class and 32nd overall at the 2014 National Hare and Hound in Murphy, Idaho.
(Pictured above is Mark negotiating a rocky section at the 2014 National Hare and Hound.)
Is Dirt Bike Linkage Protection Necessary?

So, my riding buddies have been asking me this question for awhile. I will tell you why I think it’s important to have dirt bike linkage protection and how to reduce the headache of linkage maintenance and replacing the suspension on your dirt bike.
First, why are more bikes being made with linkage suspension? Well, that’s an interesting question and let’s talk about how linkage works. Linkage moves the shock at an ever-increasing speed by compressing the shock at progressively greater amounts (for the same amount of rear wheel travel). Since the shock moves faster and farther at the end of the stroke than it does at the beginning of the stroke, its damping increases. Therefore, rising-rate linkages change the rate (read speed) at which the shock travels as the rear wheel moves. I have found that when racing my 300XC, I do not have to think about how to approach an obstacle – like a rock, log or jump face – I just hit it! Also, the “high/low” speed refers to shock-piston speed, not necessarily bike speed. The faster the shock needs to respond, the better the linkage works because it assists the shock.
Second, how long does the typical linkage last? Depending on how much you ride, your linkage suspension should last anywhere between 2 to 5 years, if you maintain and grease the linkage bearings on a “fairly” regular basis (2 or 3 times a year). With poor maintenance and a lot of riding, you can plan on the linkage bearings wearing out within a year. If you greased your linkage after each and every ride (yeah, right), conceivably your linkage would never wear out. It is a known fact that most, if not all, dirt bike riders dread greasing and maintaining their linkage. Out of sight – out of mind!
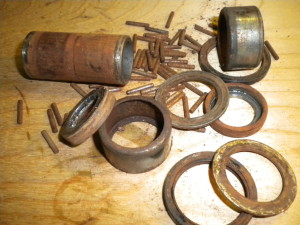
So, I know you’re wondering “Obie-Wan, what is involved in the maintenance and greasing of your linkage – I’ve never cleaned it before?” Glad you should ask. First, you’ll need to tear off the linkage suspension, the bushings and pins – check out this YouTube video on lubricating your linkage. Did I mention this is a messy job? You might think it’s intimidating, but don’t . . . it’s really not that bad. After you’ve gotten the linkage off the bike and apart you will need to do an assessment of the parts.  Are they worn out and in need of replacement? Can you tell if they’re worn out, or do you need your know-it-all buddy to come over and inspect the parts with you? If the bearings and bushings in the linkage are worn out, you will need to buy new parts, which typically run about $150 – $200, depending on whether you want to buy OEM or aftermarket. I prefer to use OEM – as Obie-Wan would say, “they will last longer and the Force will be with you.” (or something like that). If the bearings and bushings are in decent shape, clean them up with a solvent and reassemble. When reassembling, be sure to hit the bearings and bushings with a good waterproof grease. All this sounds pretty simple, right? Unfortunately, it is messy and time-consuming (it can take anywhere between 1-3 hours depending on your dirt-bike-mechanic abilities). But, done on a regular basis, you will find that the linkage will last a lot longer and you will get better, overall performance from the bike.

Finally, I know you’re wondering, “What does the Obie Link Guard do to prevent wear and tear on my linkage, how does it help me from having to do maintenance on my linkage on a regular basis, AND is linkage protection necessary?” One of the more important aspects of the Obie Link Guard, beyond the fact that it protects your linkage from damage from rocks and logs (and helps the rider with gliding over these obstacles), is that it also protects the linkage from dirt and grime entry into the linkage seal bearings, which in turn allows for less maintenance and cost of repairs. No more having to pressure wash the crap out of this area.
So, to reiterate, the Obie Link Guard protects your linkage against damage from rocks and logs, assists the rider with gliding over rough obstacles, and it protects from dirt and grime entry into the linkage seal bearings, which then allows for less cleaning, maintenance, cost, hassle and headache. Hmmm, sounds pretty darn good, Obie-Wan!

